Groups are extremely useful for managing and sorting Viewer users in your workshop. For example, you could sort users into regional sales teams and manage their access so they only see presentations relevant to their region.
You can also see analytics by group, so even if you haven't limited access to different presentations within your workshop, you can still compare how different teams are performing.
Note that only Admin and Manager users can create and manage other users in groups!
In this article we'll cover:
How to add users to a group
How to remove users from a group
Create a group
Here's how to create a group to put users into:
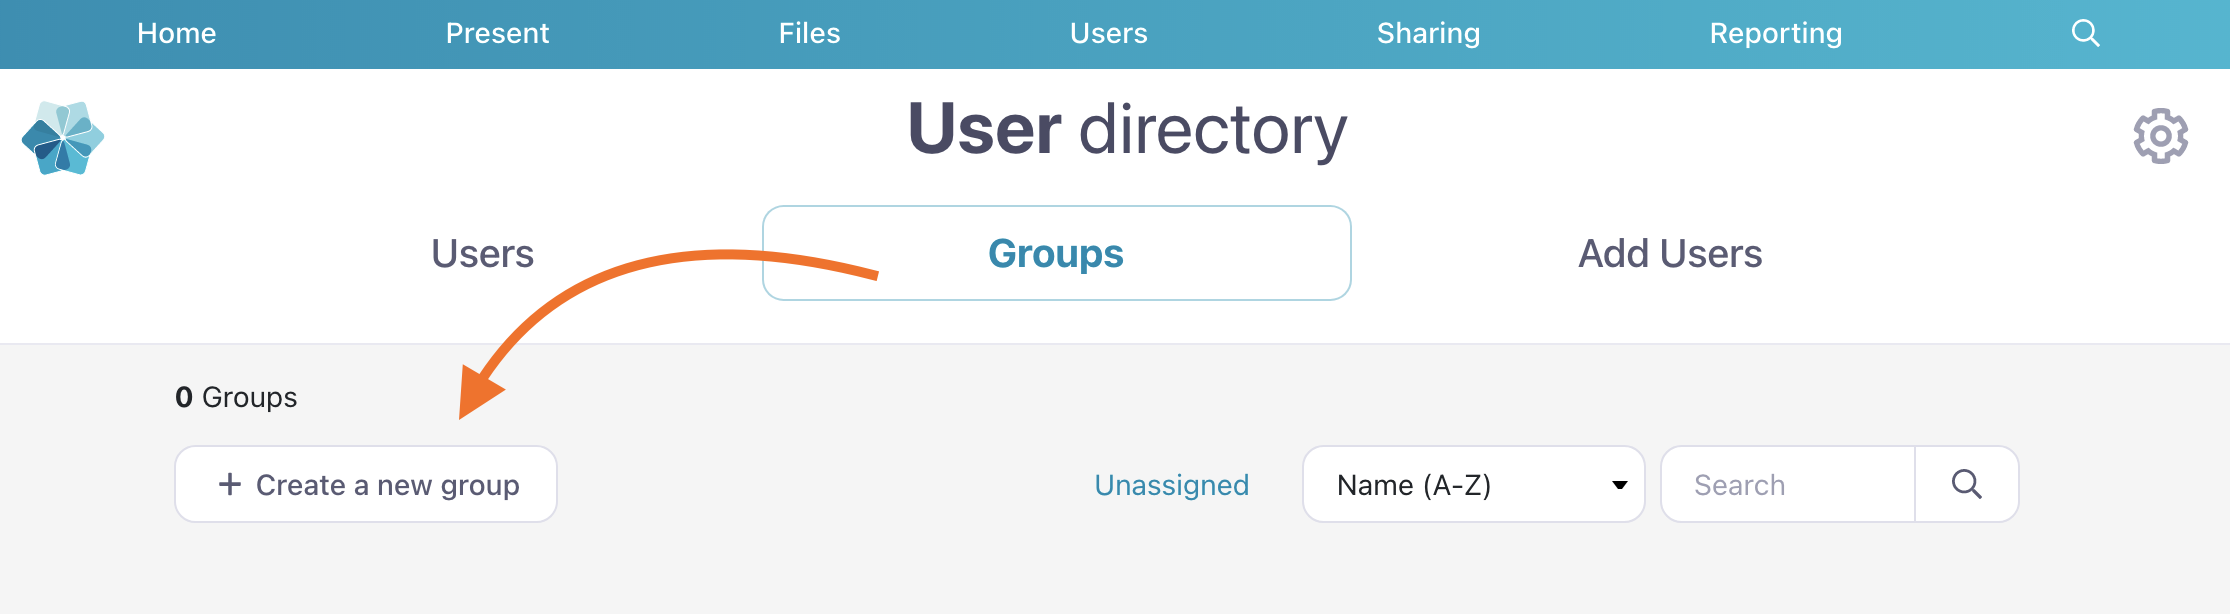
Open the web platform and click the 'Users' tab in the toolbar at the top of the page.
In the 'User Directory', select the 'Groups' tab.
Click the ‘Create a new group' button.
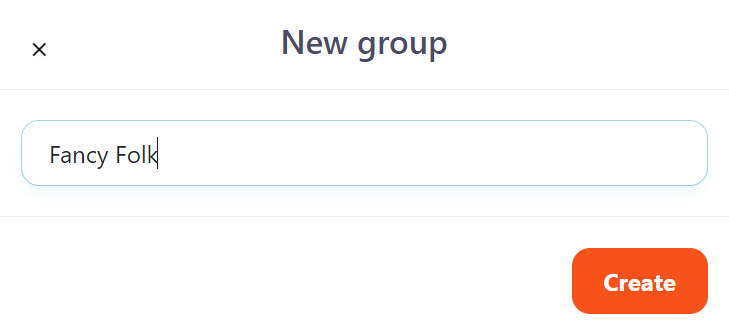
Enter a name for your group in the pop-up box and click ‘Create’.
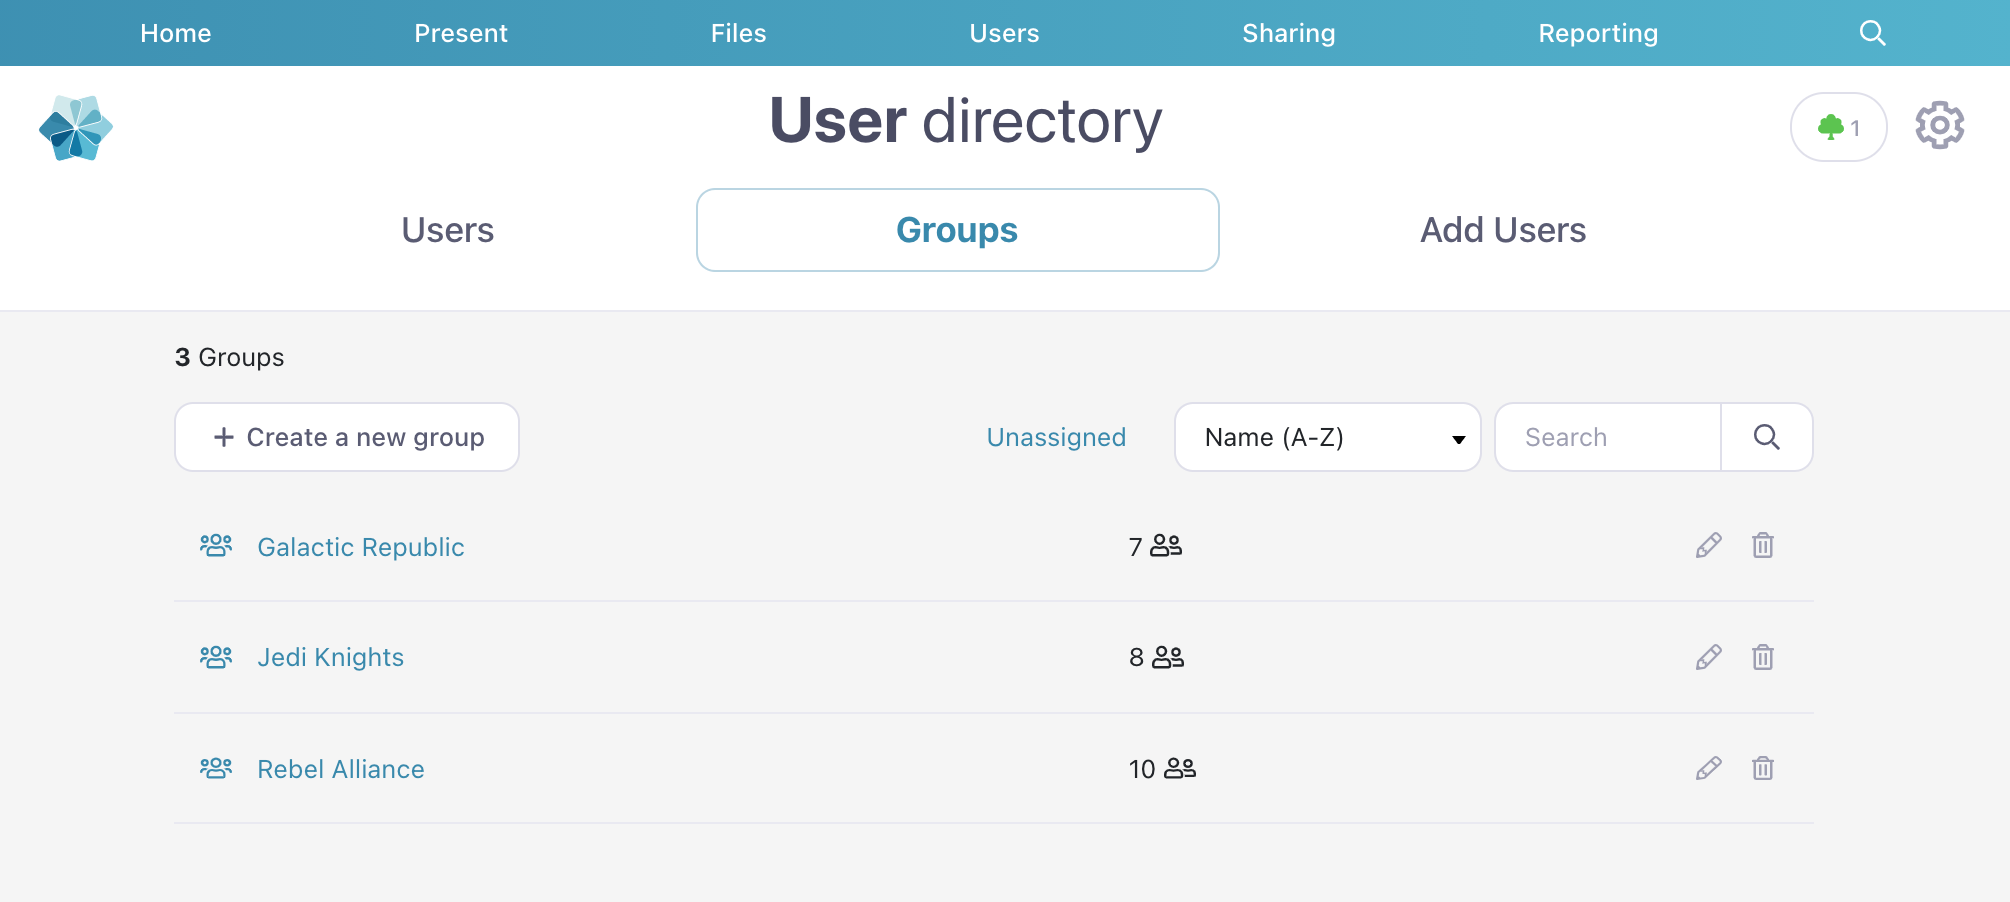
Your group will appear in the list automatically. From here you can click into the group to add users, or edit the name if you've made a mistake.
You can make as many groups as you like, and add users to more than one group to fit your needs. Go nuts!
Add a user to a group
You can add a user to a new or existing group in two ways:
From the Groups page:
Log in to the Showcase web platform and click Users at the top of the screen.
Select the ‘Groups’ tab.
Click a group name from the left hand side.
Click 'Add User to Group' and select a user from the drop-down menu.Note: you can type a search term in this box, and use the up and down arrow keys on your keyboard to navigate to different users on the list. Use the 'Enter' or 'Return' key to select that user from the list. This allows you to add multiple users to the group in quick succession.
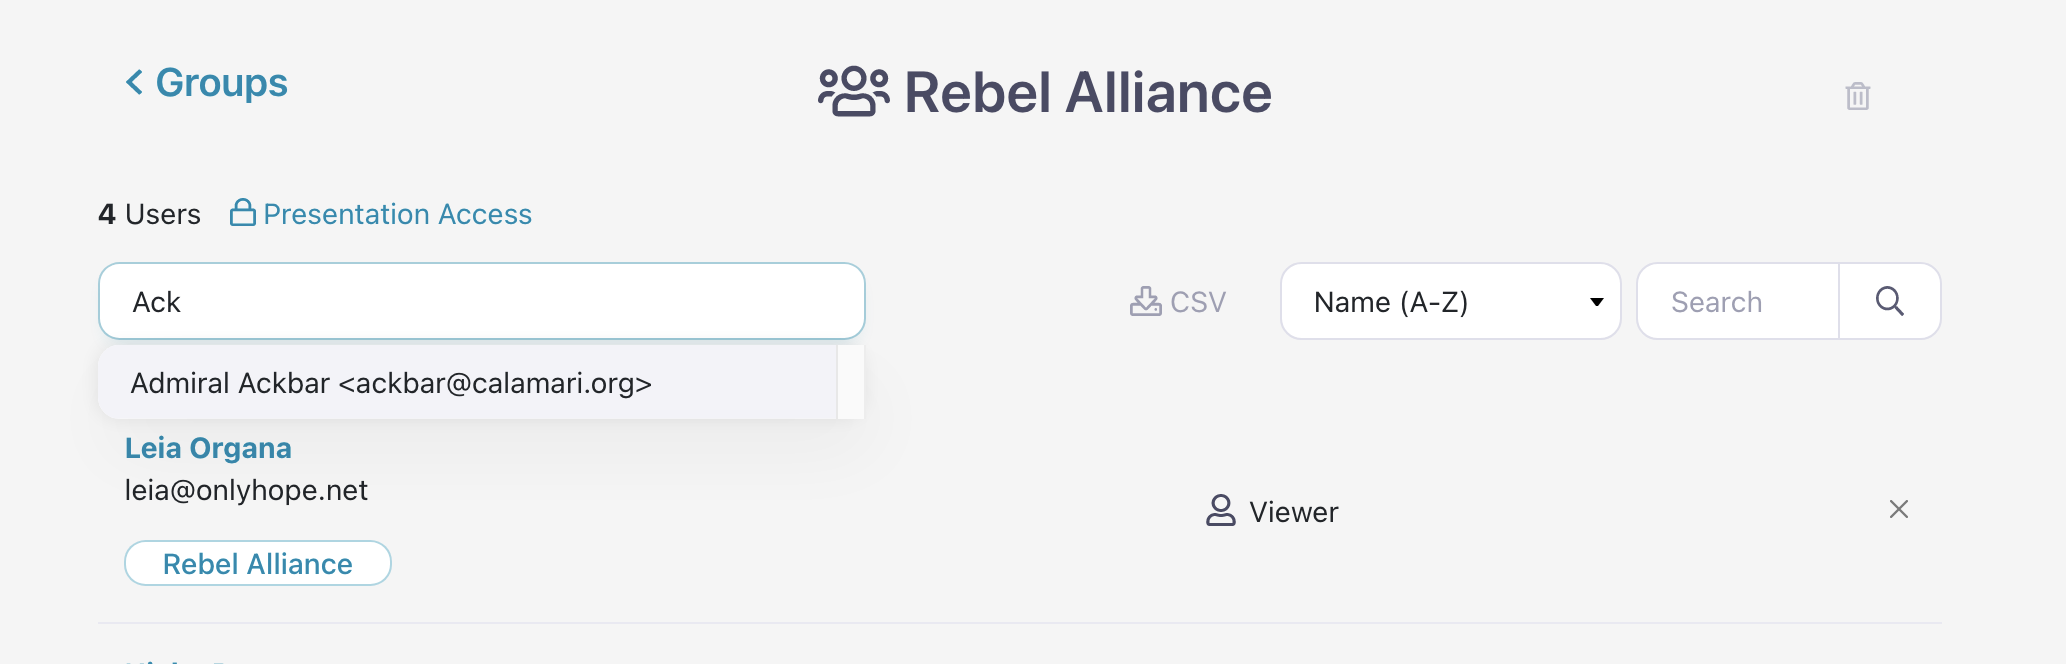
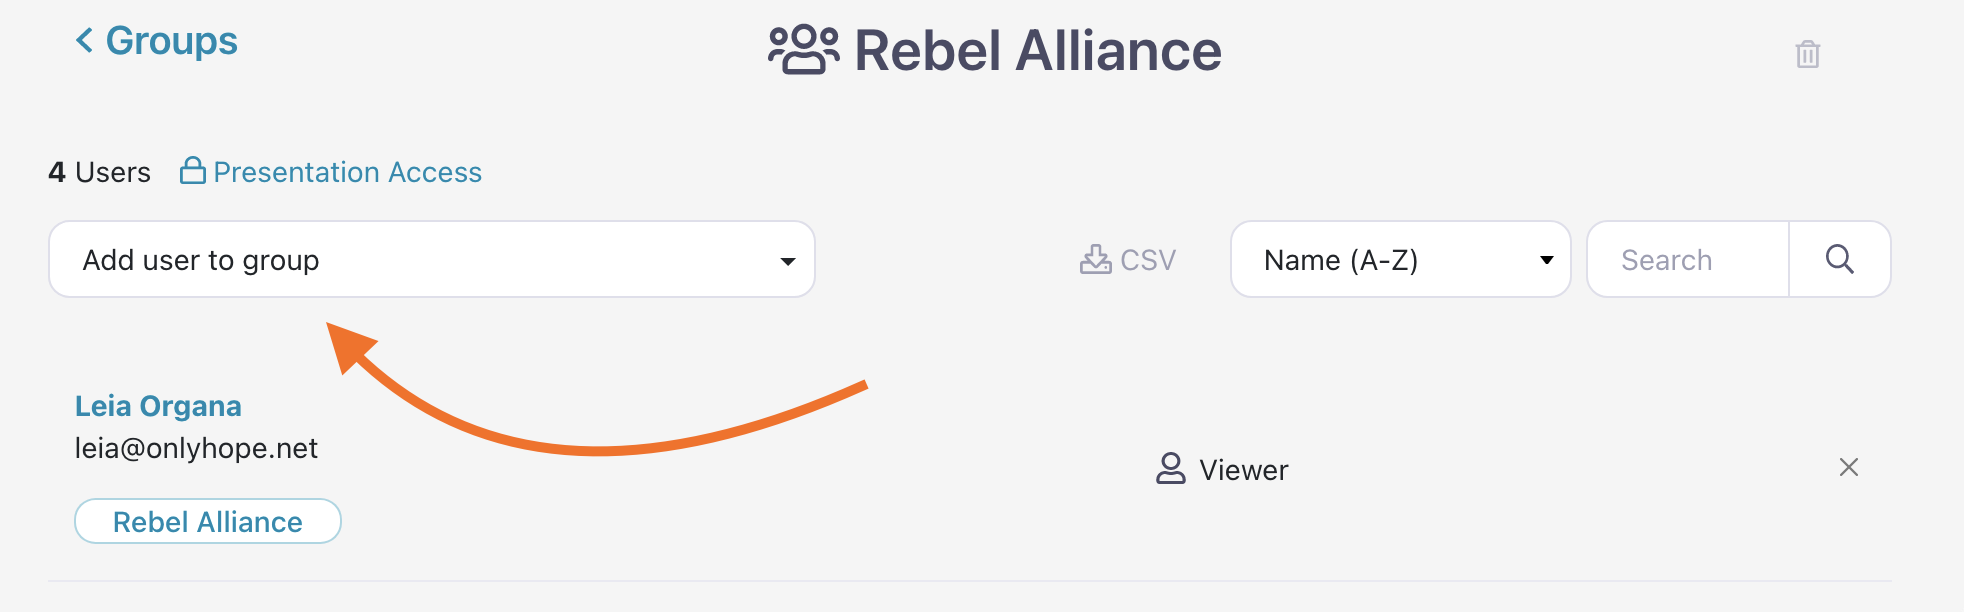
Voilà! The user has been added to the group!
From a user's page:
Log in to the Showcase web platform and click Users at the top of the screen.
Search for the user you want to add to a group, or scroll the list to find them. Click their name.
Scroll down on the user details page — after the 'Role' section is a section titled 'Groups'.
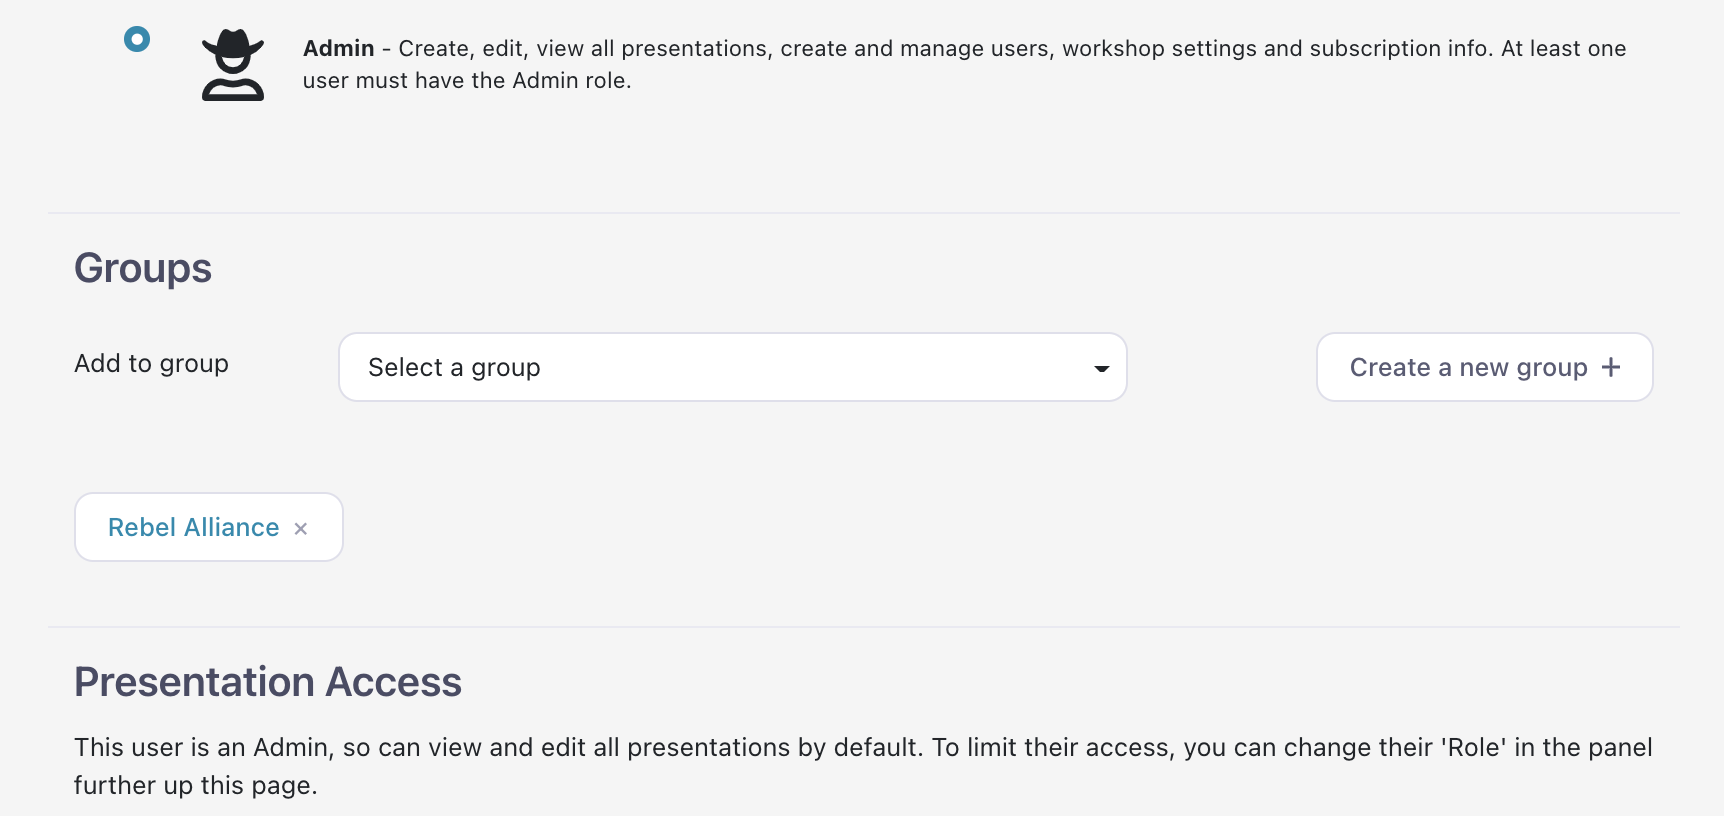
From here, you can select a group from the dropdown, and add the user there. You can even create a whole new group from this page if you need to!
Remove users from a group
Open the web platform and click 'Users' from the menu at the top of the screen.
This will open the User Directory. Select the 'Groups' tab and click the name of the group you want to edit.

Locate the user you want to remove (you can use the search bar if you have a lot of users) and click the 'x' at the end of their row.
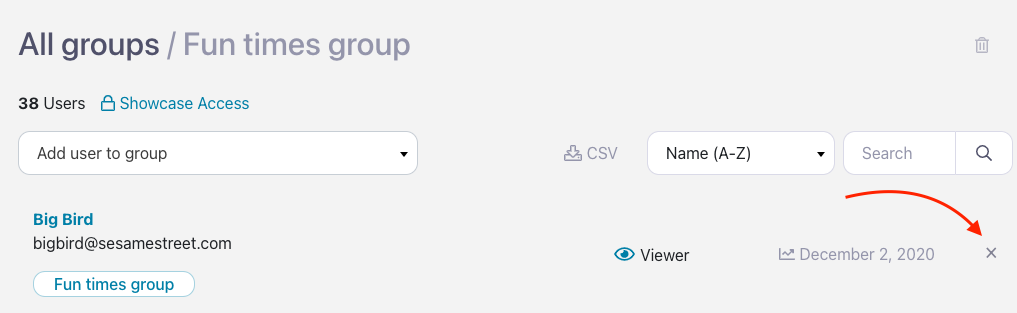
Tada! The user has been removed from the Group — but you can add them back at any time. No need to save anything; we'll save your changes automatically.
Delete a group
If you no longer need or use a Group, you can easily delete them.
First important note: Groups must be empty (free of users) to be deleted. Make sure you follow the process above to remove users from a group before attempting to delete it.
Second important note: Deleting groups cannot be undone! If you want to reinstate a deleted group, you'll have to recreate it from scratch and re-add the users.
Alright, now that we've got that out of the way — here's how to delete a group:
Log in to the Showcase web platform and click the Users tab at the top of the screen.
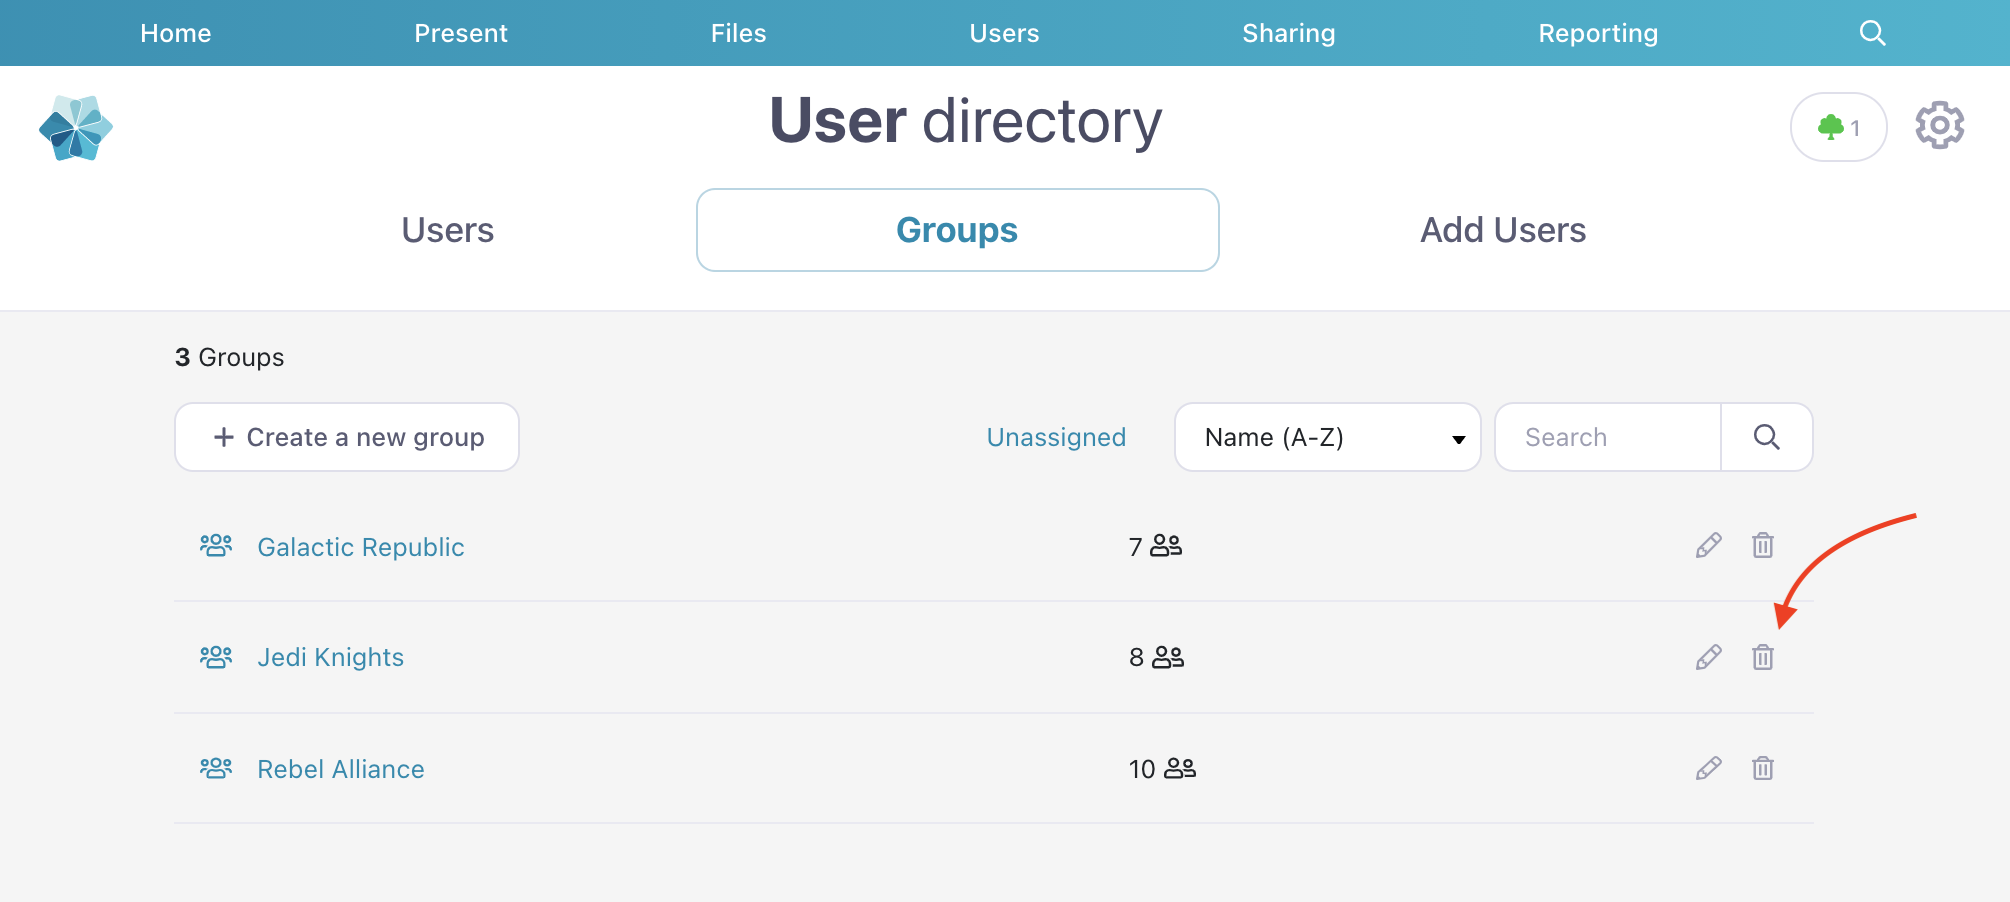
This will open the User Directory. Select the 'Groups' tab to view and edit your Groups.
Find the Group you want to delete and click the trashcan icon next to it.
You can also delete a Group from the Group Details page. To do this, click the name of the group and select the trashcan icon in the top right of the Group Details page.
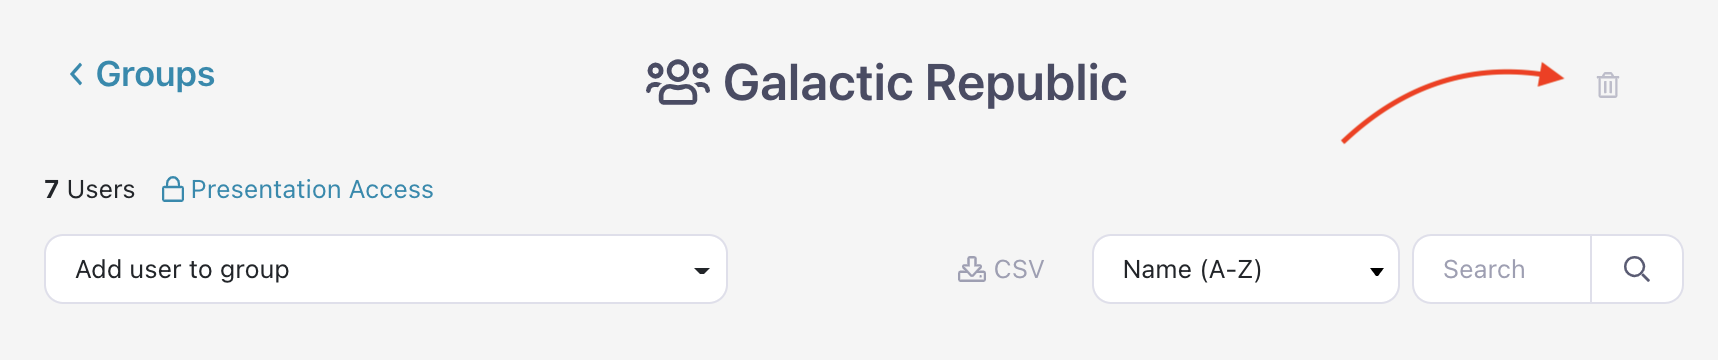
Poof! The group is gone forever.