Recently updated a file that appears in multiple presentations? Don't replace it in each presentation individually — use the 'Replace All Usages' function to save yourself some time.
Here's how to replace a file in multiple presentations at the same time:
Open the web app and click the 'Files' tab to open your File Library.
Find the file you want to replace. If you've got lots of files, there's a 'Search' bar in the top right to help you out.
Click the 'Usages' icon in the toolbar (it looks like a question mark in a bubble).

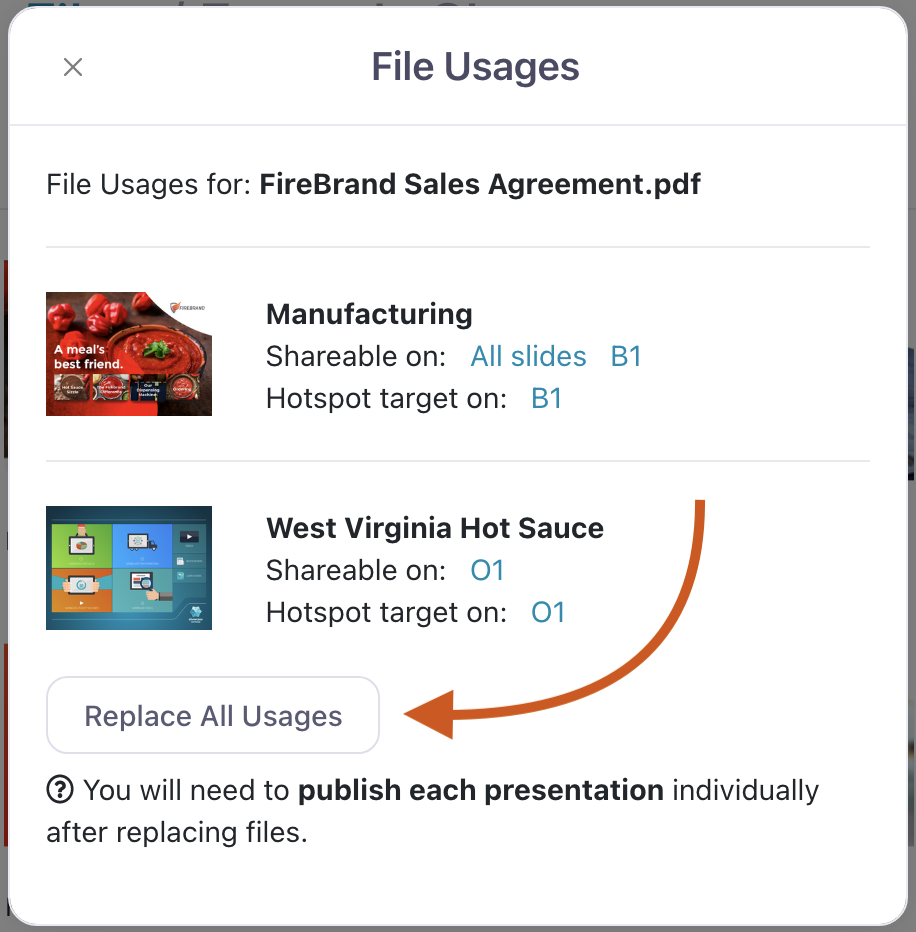
This will open the File Usages dialog where you can see exactly which presentations and hotspots the file is linked to. Click 'Replace All Usages' to select or upload a file to replace the one selected.
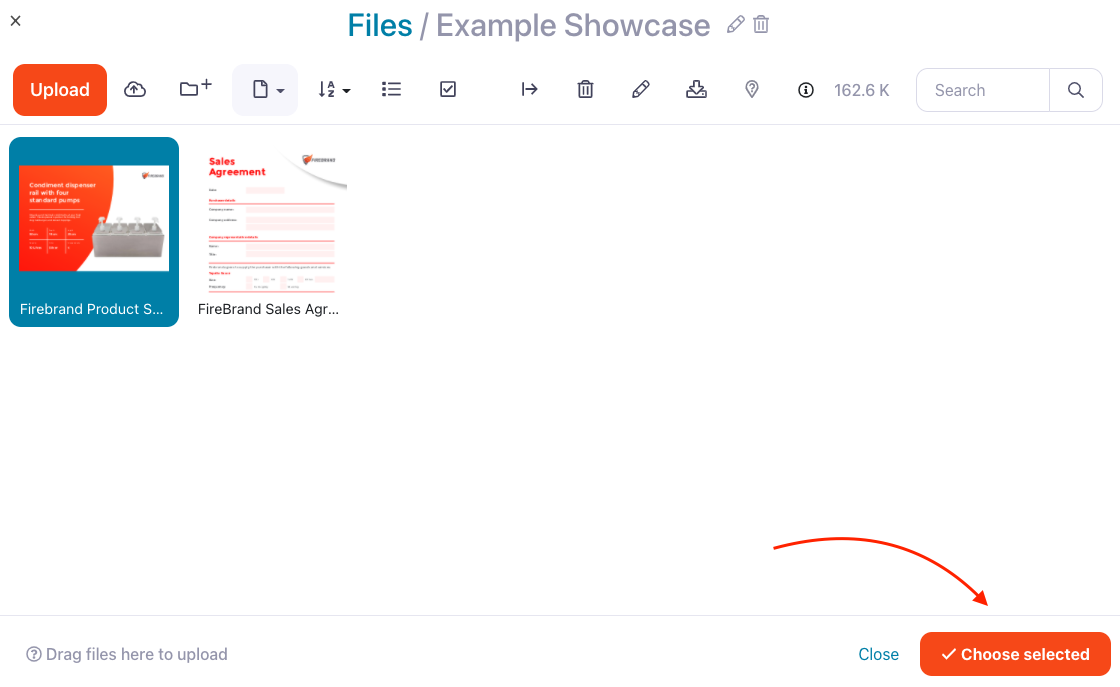
You'll be directed to the File Library in a pop-out box where you can select an existing file or upload a new one. When you're done, click 'Choose selected'.
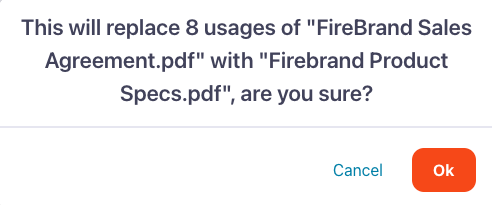
We'll remind you that you're replacing an existing file to give you one last chance to check. If you're sure, hit 'Ok'. If you've got cold feet, click 'Cancel' to start over.
You'll need to publish each affected presentation individually to ensure the replacement is visible to all your users. We leave the publishing power in your hands in case there are any other changes you want to make. God speed!