
If you've ever wanted to turn your sales presentation into a virtual trade show, you're in luck. Showcase's VIP Pass feature lets you share public-facing presentations with large groups of prospects with the click of a button.
VIP Pass links are designed to help your team be more productive and communicate more effectively — no matter where or how they like to do so. Here are some ways you can use it:
- Email existing customers and prospects that you can't visit in person.
- Share to all your social media channels to engage prospects who haven’t given you an email address yet.
- Share the link on your product web page or in a blog post.
- Ask your entire team to add the link to their email signatures.
Showcase has built-in tracking features that make it super easy to follow up with prospects about the content you share too!
Share from a device
- Open the app on your favorite device and navigate to the presentation you want to share content from.
- Tap the 'Sharing' button in the top right of the screen (it's the one with a bent arrow pointing to the right).
Note: If you can't see this icon, it means the presentation doesn't have any shareable content! If you have a great idea for content you want to share, ask an Admin user from your Workshop to set it up for you. If they're not sure how to do this, direct them to our articles on allowing users to share the full presentation, share content from a specific slide, and share content from all slides. - Tap the content you want to share to select it. There's no limit so go wild!
Note: If you share the full presentation, it will open at the same slide you're sharing from. - Select 'VIP Pass' under 'Share via' and tap 'Next'.
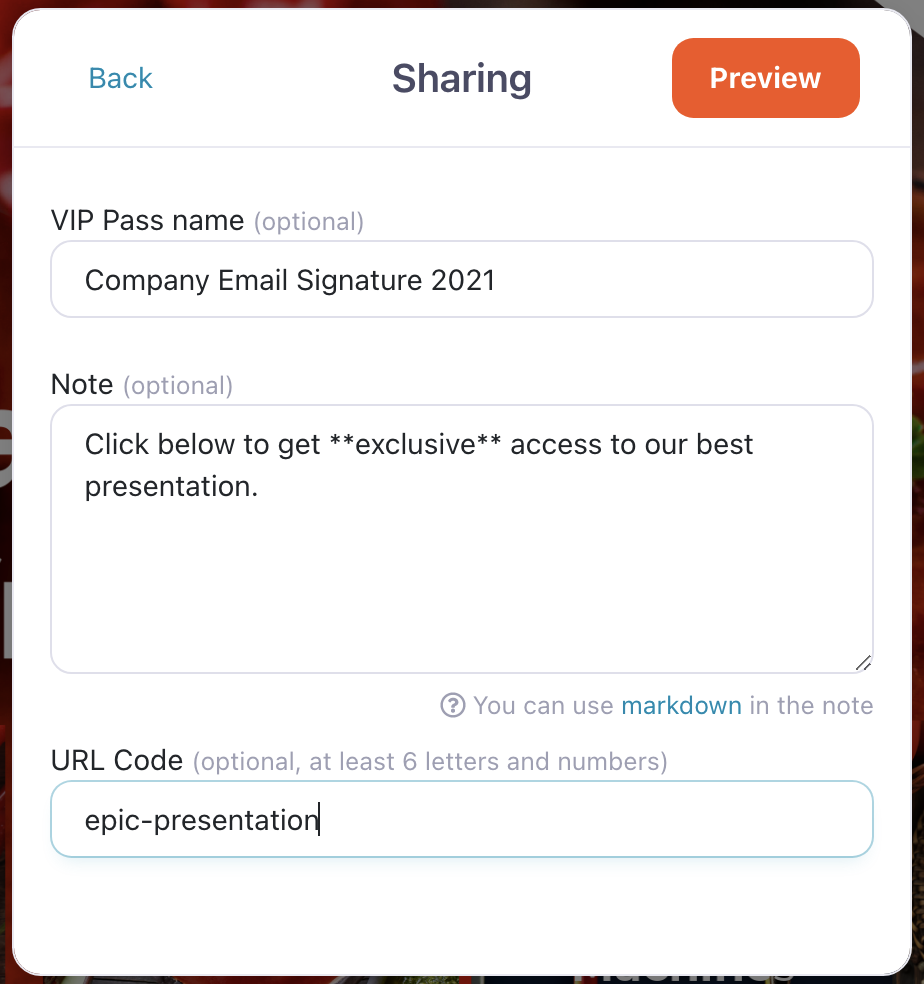
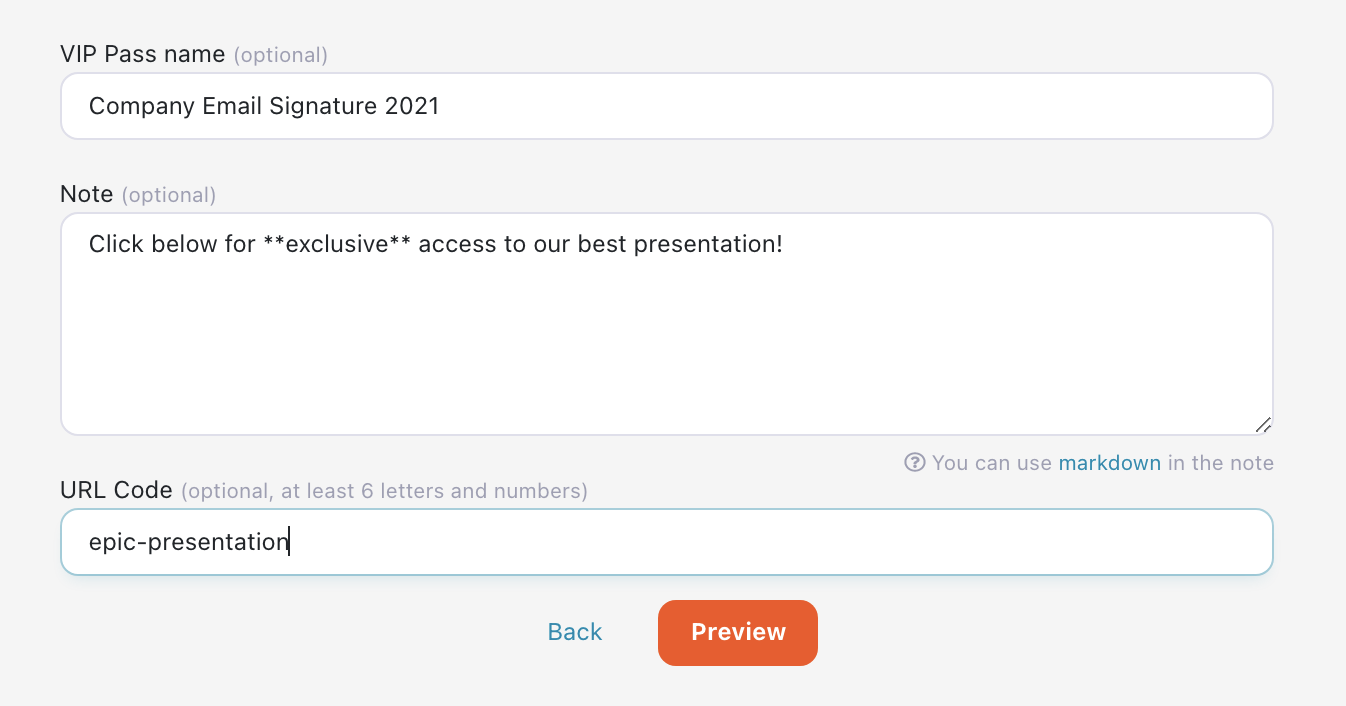
- On the next screen, you can enter a custom title, note for your prospects, and URL code. These fields are completely optional — if you leave them empty, we'll generate a title and URL code and leave the note as "The following content has been shared with you". You can use markdown in your note to add some formatting and style if you want!
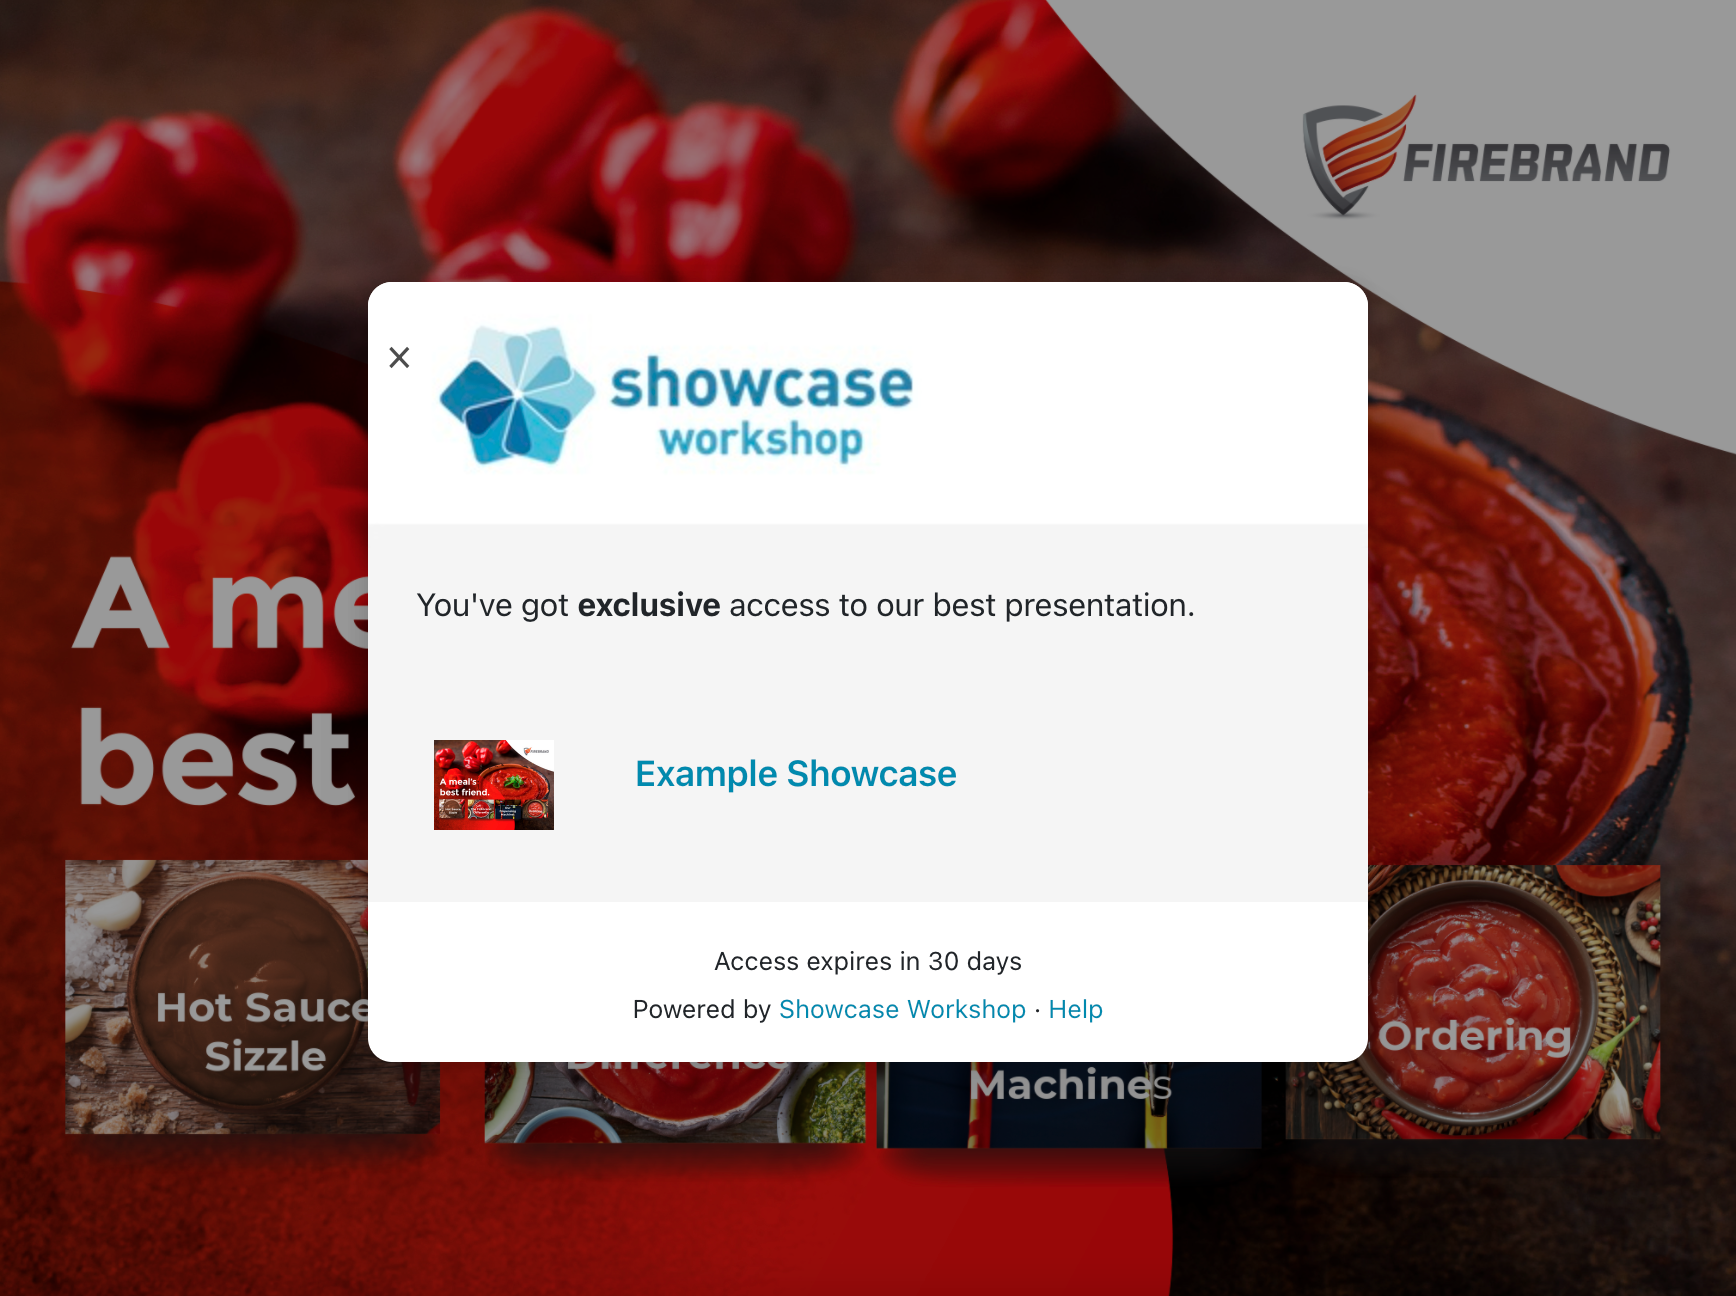
Note: Entering something in the 'VIP Pass name' will not rename your actual presentation; it's more for distinguishing your link(s) so you can keep track of them in Sharing History. - Click 'Preview' to see how the link will appear to recipients. When they follow the link, they'll get a pop-up box similar to this one with your custom note.
- If you want to make further changes, hit the 'Back' button in the top left corner. When you're happy with your VIP Pass, tap 'Save'.
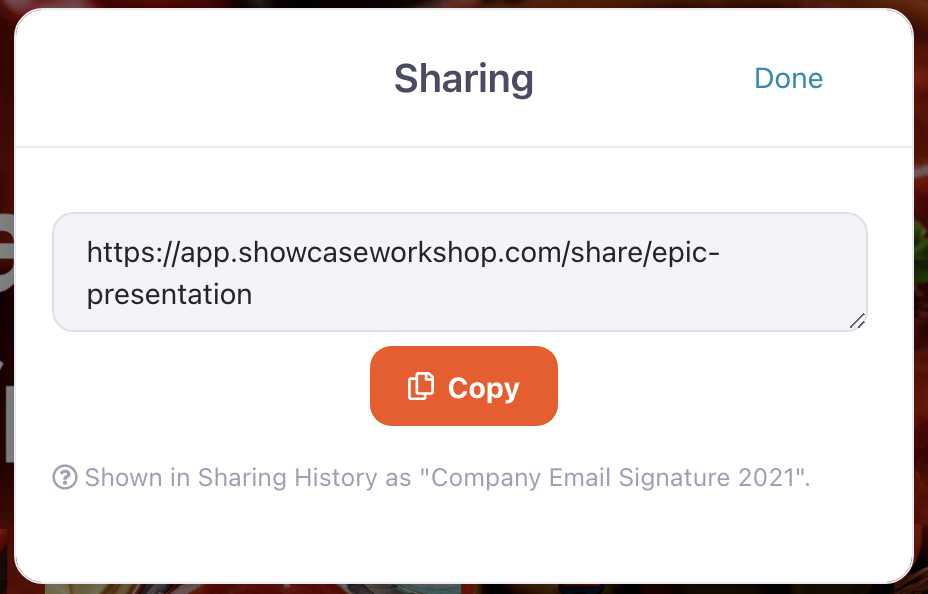
- The next page will display your custom link which you can copy and paste anywhere you can think of!


Share from the web app
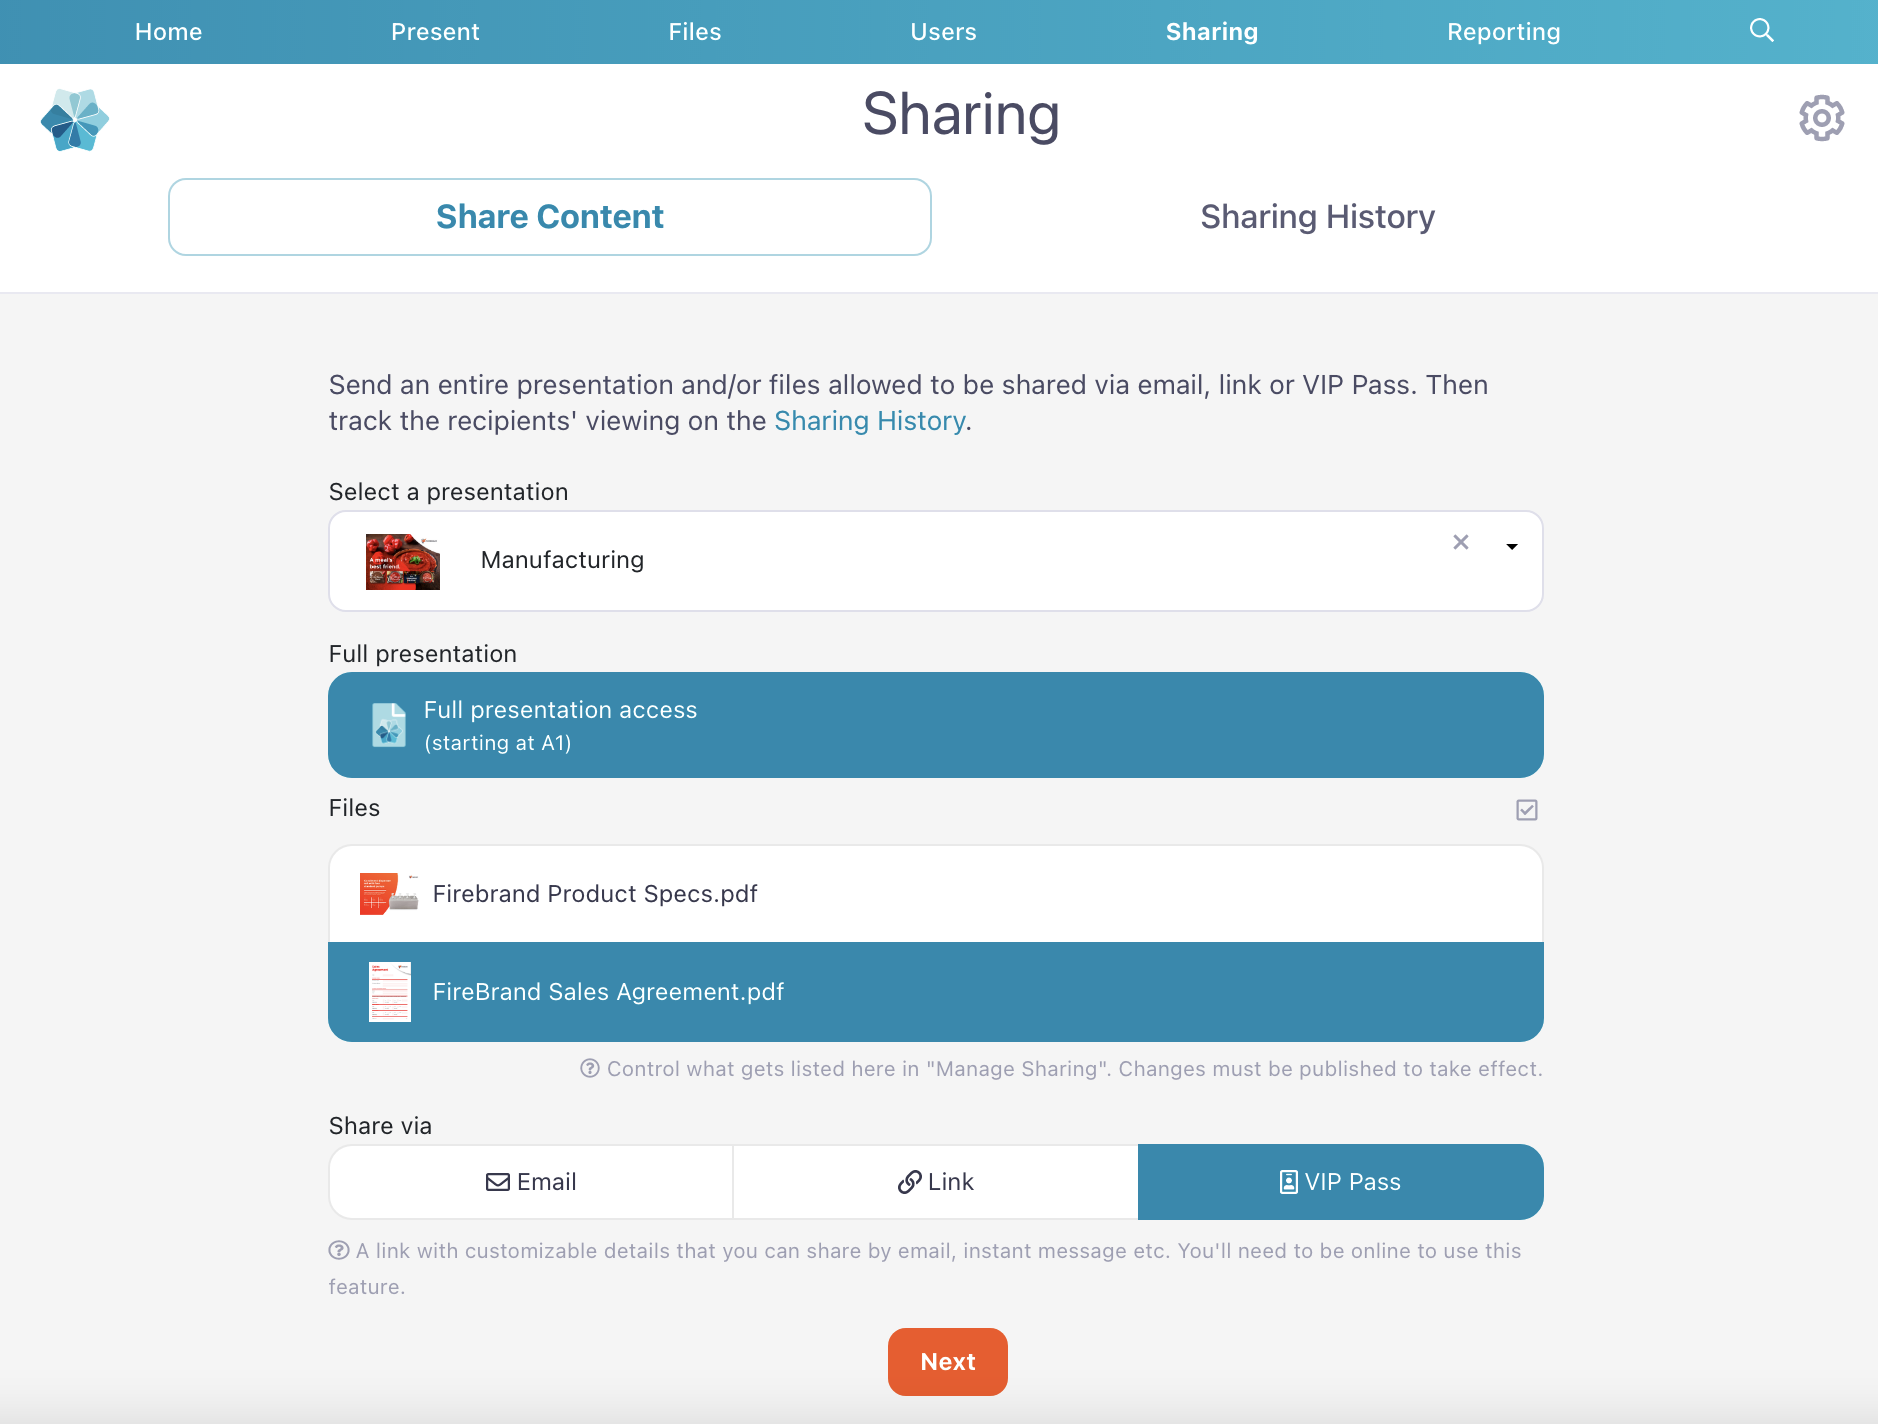
- Open the web app and click 'Sharing' in the toolbar at the top of the page.
- The 'Share Content' tab will be selected by default. Choose the presentation you want to share from the dropdown menu under 'Select a presentation'.
-
Once you've selected a presentation, any shareable files will appear in a list under it. Click any files you want to share to select them.
- Under 'Share via' select 'VIP Pass' and click 'Next'.
- On the next screen, you can enter a custom title, note for your prospects, and URL code.
These fields are completely optional — if you leave them empty, we'll generate a title and URL code and leave the note as "The following content has been shared with you". You can use markdown in your note to add some formatting and style if you want!
Note: Entering something in the 'VIP Pass name' will not rename your actual presentation; it's more for distinguishing your link(s) so you can keep track of them in Sharing History. - Click 'Preview' to see how the link will appear to recipients. If you want to make further changes, hit the 'Back' button in the top left corner. When you're happy with your VIP Pass, tap 'Save'.
- The next page will display your custom link which you can copy and paste anywhere you can think of!
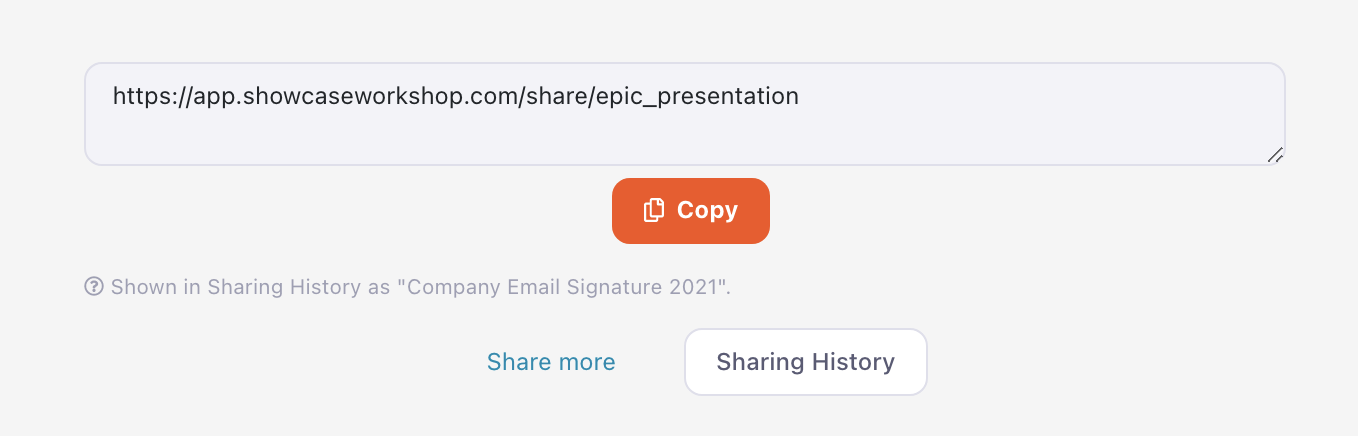
Note: VIP Pass links will expire at the end of the sharing time limit set by your Admin. The default setting is 30 days, but an Admin user can change the sharing time limit by following these instructions — just keep in mind this will change it for the entire workshop!